
1:2 planning wall layout in 360° Immersive spaces…

Example of wall layout template ©New Realities Lab 2024
Hopefully, you've checked out our intro to equirectangular maps (if not click the link below this section). Now, let's dive into how this relates to the walls in our immersive space and how we'll craft content to fit seamlessly. Ensuring text and focal points align perfectly with the room walls ensuring an ideal experience for our audience.
Click for Previous blog > 1:1 What Is Equirectangular Projection Mapping?
First, let's examine the overlay template in detail, then explore how to leverage it for planning our 360 content creation.
Download our compositing template below for FREE
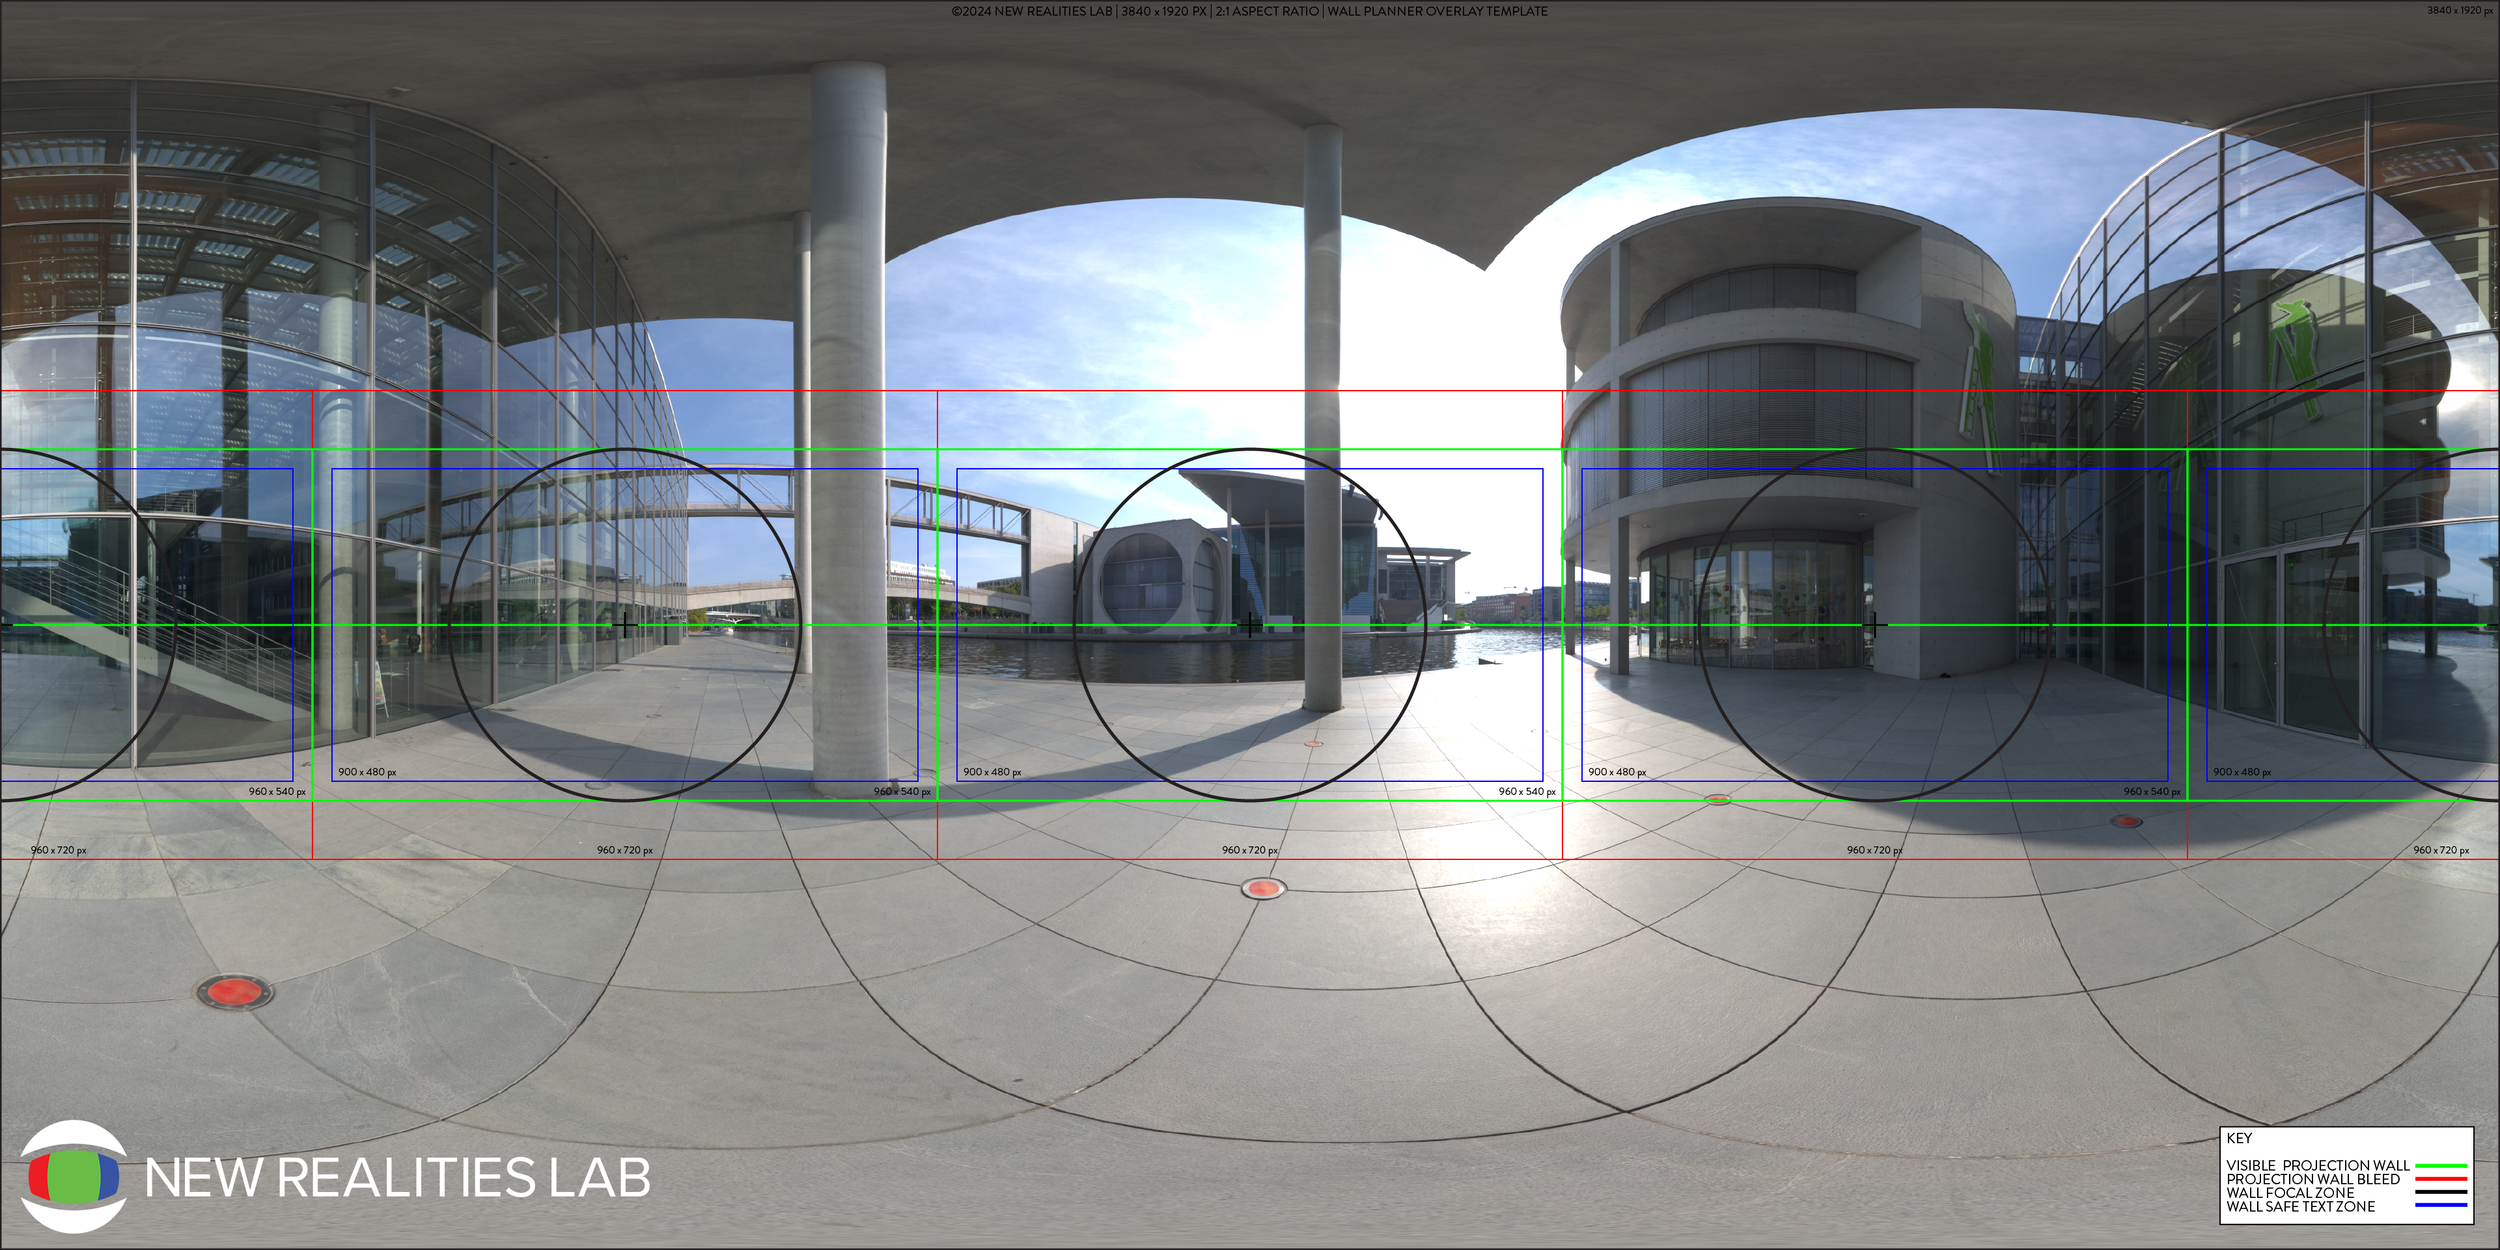
Fig.1> Example of wall layout template overlayed on a 360° photograph of a building ©New Realities Lab 2024
As seen in Fig.1> by overlaying our template onto a 4K - 2:1 aspect ratio 360° image (3840x1920) we can now analyse what fits in our scene and plan for navigation, corners, and focal points. Let's break it down to one wall for a clearer understanding!
*Remember we are working in 3 dimensions so everything you can see above the templates green lines is effectively “ceiling” and below the lines “floor” so unless you are working with floor or celling projection you will not see this part of the content field.

Fig.2> Example of 1 wall of the layout template ©New Realities Lab 2024
Fig.2> As evident in the one-wall cross-section, our layout features a circular focal region with a central focal point or horizon line, a blue safe text box, and a green outer scene frame. When shooting or creating graphics for one wall, our goal is to keep focal elements centred within the circular area, ensuring the overall scene fits neatly within the green box. The blue safe text box minimizes text warping, as explained in our equirectangular blog (link), whilst also maintaining legibility away from room corners. We can see how this translates into a 3D space/environment below.
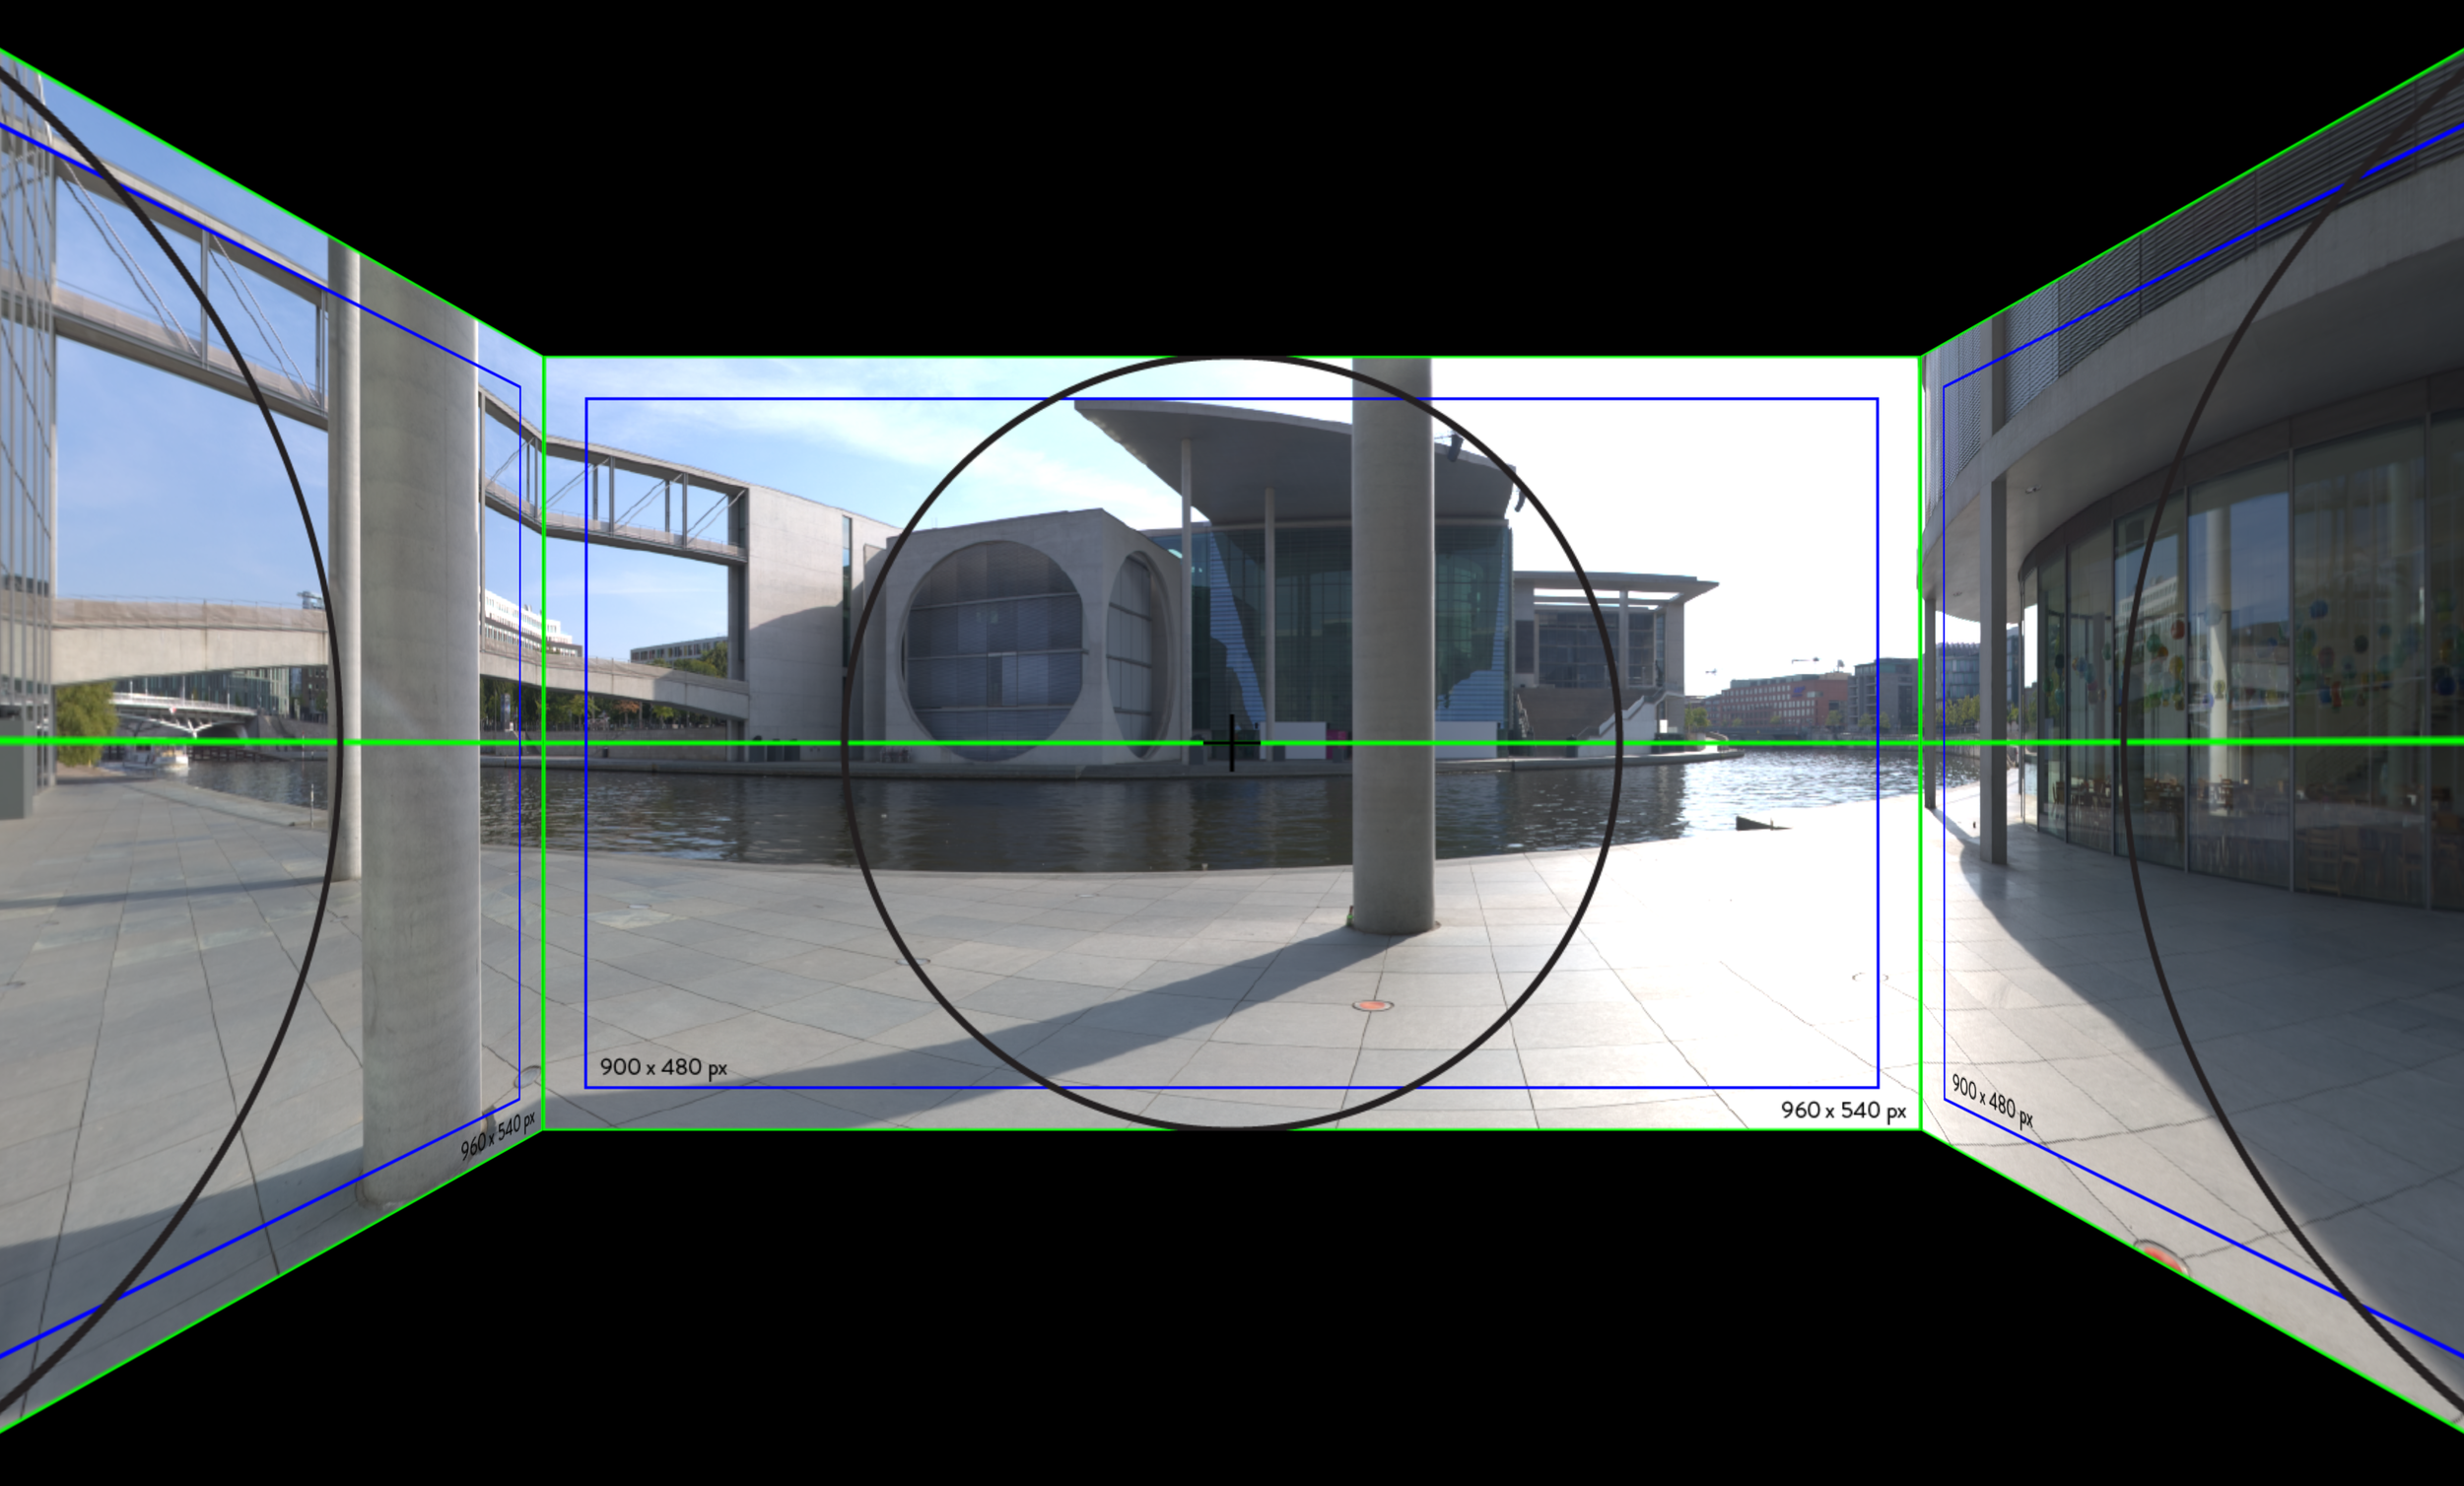
Fig.3> Example of layout template in immersive room projection ©New Realities Lab 2024
When addressing the bleed section, a full corner to corner canvas may not always be available or needed to extend into the room corners, especially when creating a seamless background just for the room walls. In the example below Fig.4> where the plan is to wrap a seamless space image around the room walls then when we create the canvas there is no need to fill the whole canvas as it will not be seen. But we should always take our image to the furthermost regions of the red bleed area to ensure we are taking the image past the edge boundaries of the room walls (this will never be seen as there is no projection on these areas of the wall).

Fig.4> Example of layout template on seamless space background ©New Realities Lab 2024
Fig.5> Now looking at the space canvas in an immersive room we can see the bleed area is not visible, but it gives us a couple of hundred pixels play with upper and lower edges, in case of projector or physical room wall movement.
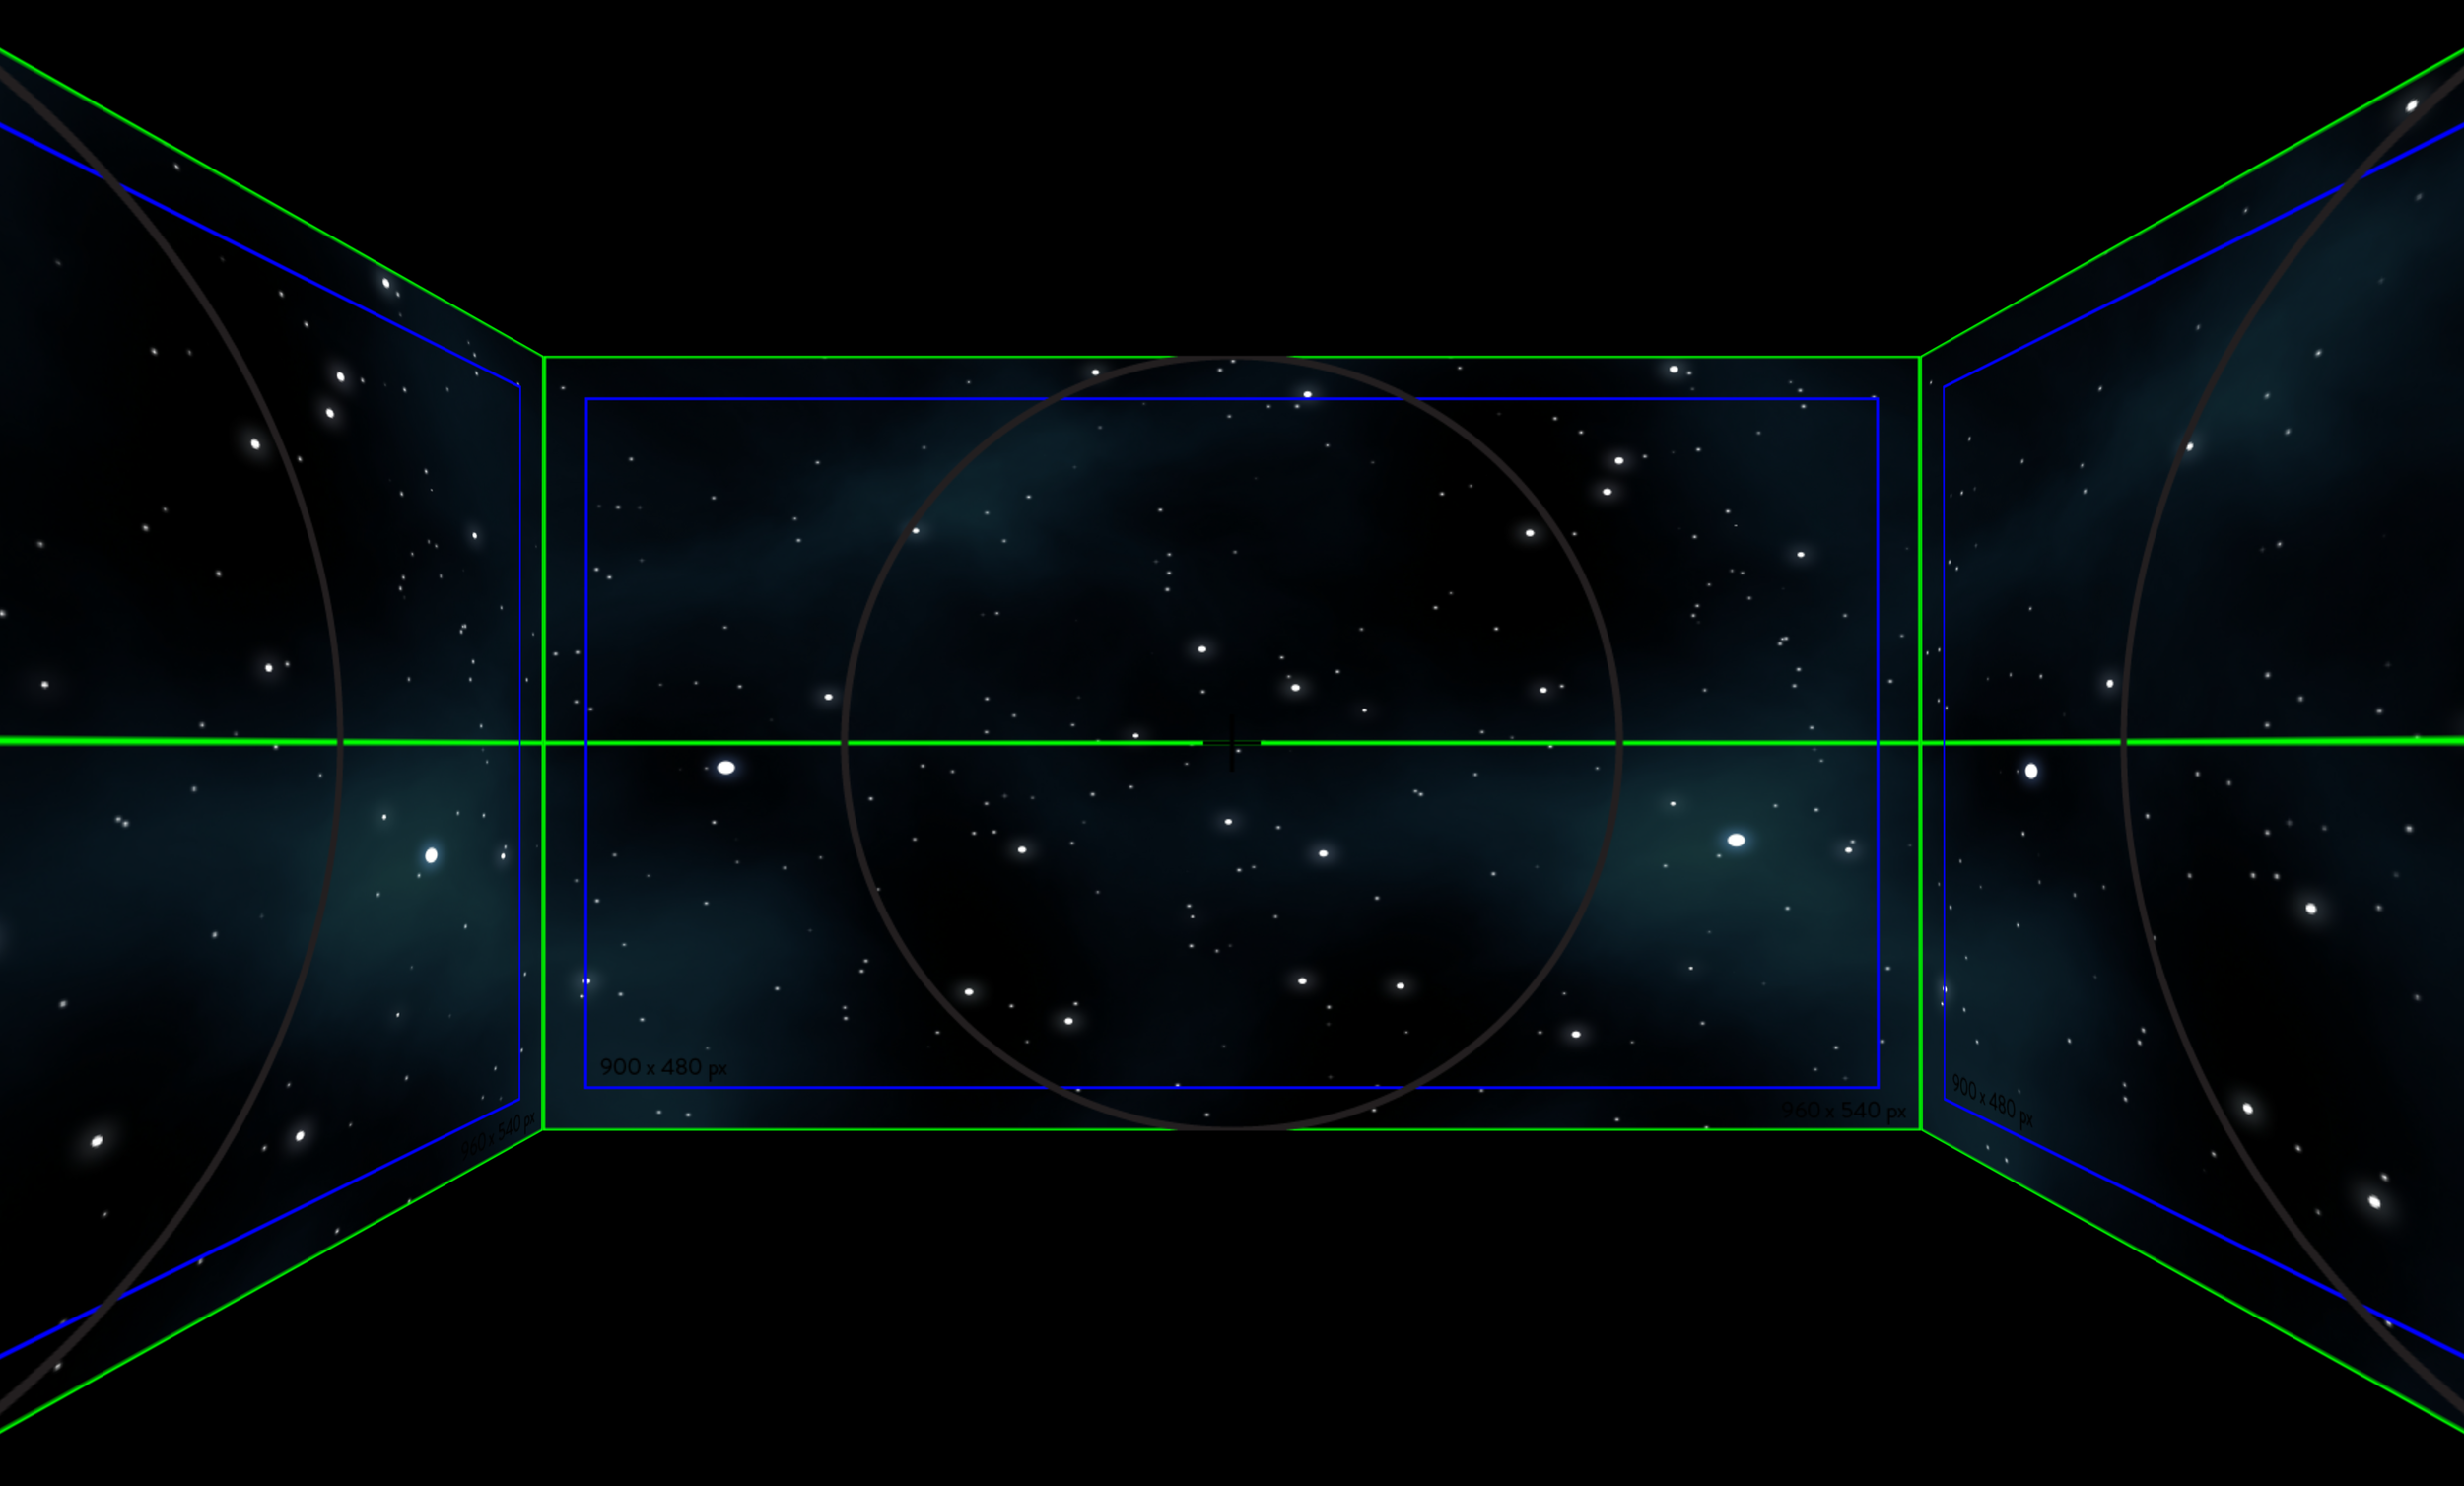
Fig.5> Example of seamless space background in immersive room ©New Realities Lab 2024
So what part of the image appears on each wall in the room? well lets look at Fig.6> Fig.6:1> and as we can see the room is broken down into 4 x 960x540px walls with F as the focal wall or main wall, then L & R as left and right wall. The key to your planning is BK1 & BK2 which are back wall 1 & 2. These walls are effectively your back wall (or entrance wall with door) they will join together seamlessly to become the back wall, creating the immersive sphere/environment.

Fig.6> Example of wall locations in your 3D immersive space ©New Realities Lab 2024
Fig.7> Overlaying the template on an equirectangular image and then looping it in a 360° video player we can see the seamless nature of the grid, and what parts of the video will fall outside of the viewing area in an immersive space.
Fig.7> Example of layout grid applied to seamless video loop ©New Realities Lab 2024
Now that you've got the lowdown on how your equirectangular images and 360° videos fit into your immersive space, it's time to get creative and start arranging objects and text in your scene to construct your lessons or immersive experiences. Stay tuned for our next blog, where we'll dive into adding these elements using the grid and space layout knowledge we've already covered!.